[TUTORIAL] How to install and configure OSCAM on HDMU
Here is a tutorial on the installation and configuration of OScam on the Vu+ decoder under a HDMU image.
For this tutorial you need.
Material:
MIPS CPU
atemio6000
atemio6100
atemionemesis
azboxhd
azboxme
azboxminime
dm7080
dm8000
e3hd
e4hd
et4x00
et5x00
et6x00
et7x00
et8500
et9x00
FormulerF1
FormulerF3
gbquad
gbquadplus
gb800solo
gb800ueplus
optimussos1
optimussos1plus
optimussos2
optimussos2plus
sf108
sf128
sf138
sf208
sf228
sf3038
sf98
vuduo
vusolo2
vuzero
xcombo
xpeedlx
xpeedlx3
xpeedlxcc
xpeedlxcs2
ARM CPU:
gbquad4k
gbue4k
sf4008
wetekplay
Software:
Winscp for WINDOWS XP,WINDOWS 7, WINDOWS, 8.1, WINDOWS 10, WINDOWS 11
A OScam subscription
If you do not have a OScam subscription you can order it here
1- Installing the OSCAM
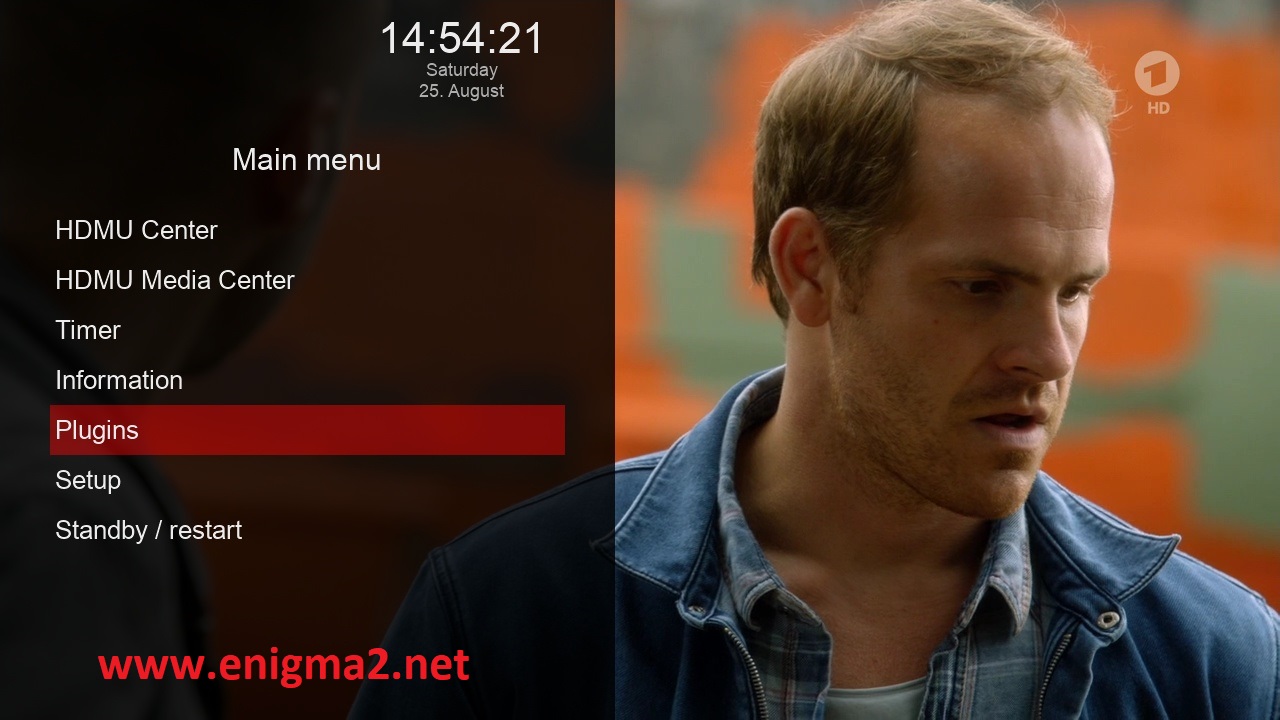
Menu –> Plugins
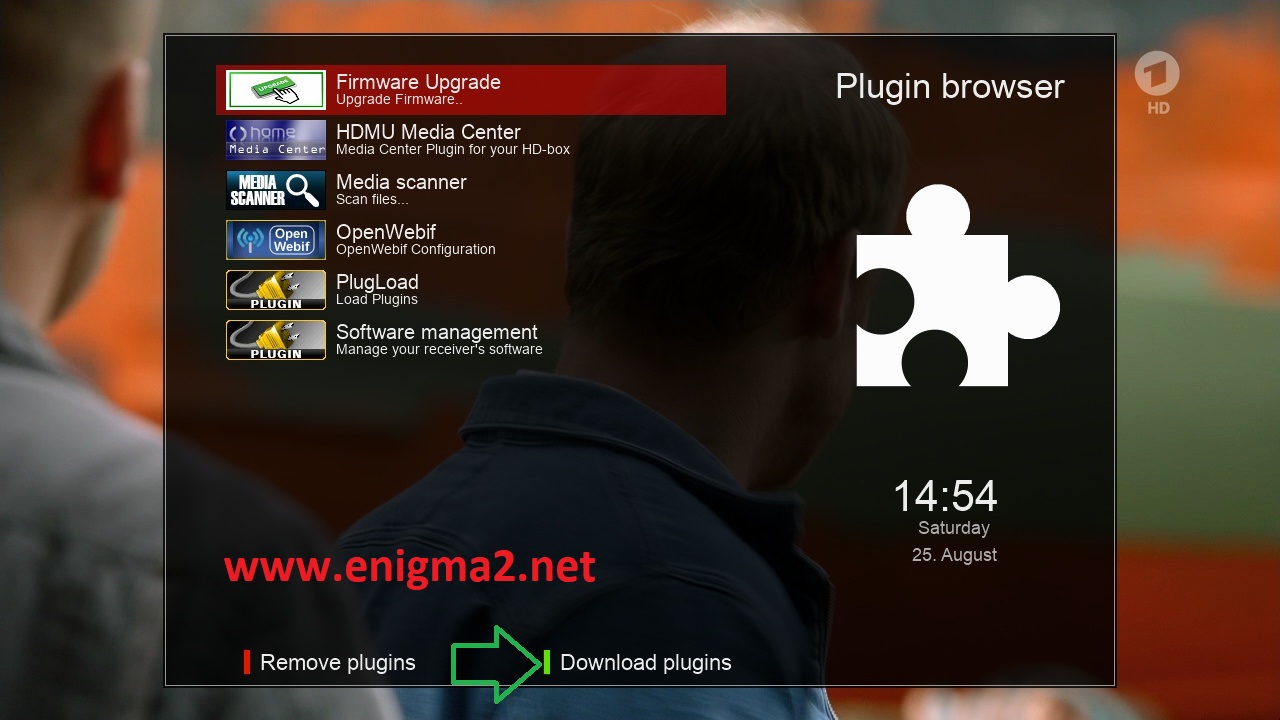
Press GREEN BUTTON to download plugins

Select EMU and press OK
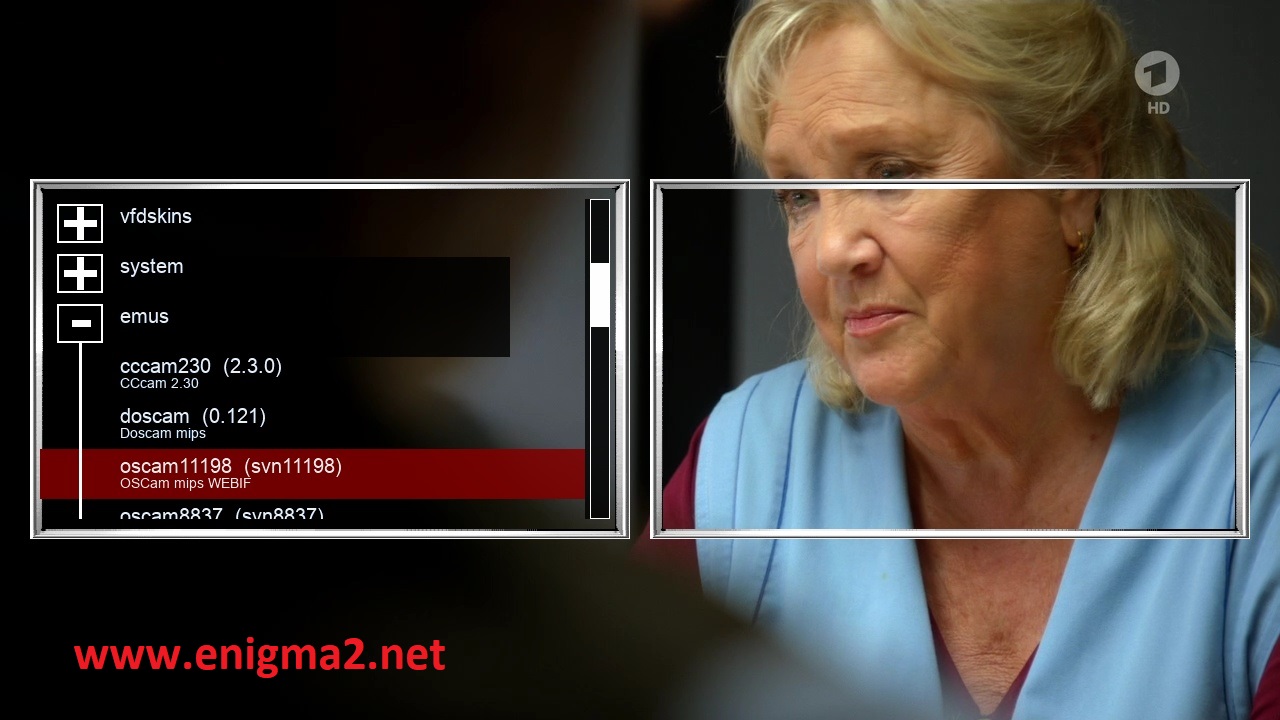
Choose OSCAM

choose YES to confirm installation

The installation will take some seconds, please wait.
after installation press Exit
2. Copy of the OSCam subscription
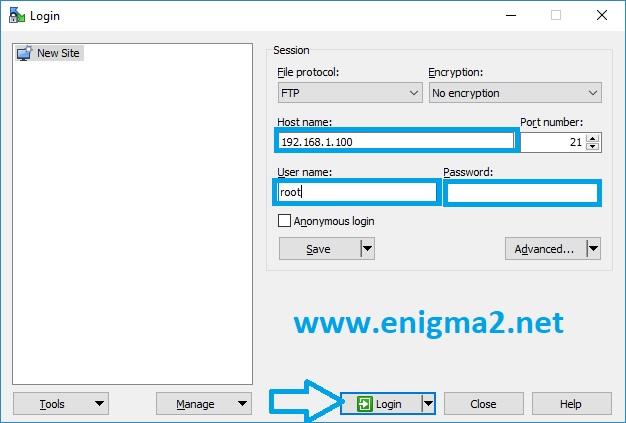
– Launch WINSCP in the home window
File protocol: FTP
Hot name: 192.168.1.100 (ip address of your VU+ )
User name: root
Password: hdmu
After clicking on Login
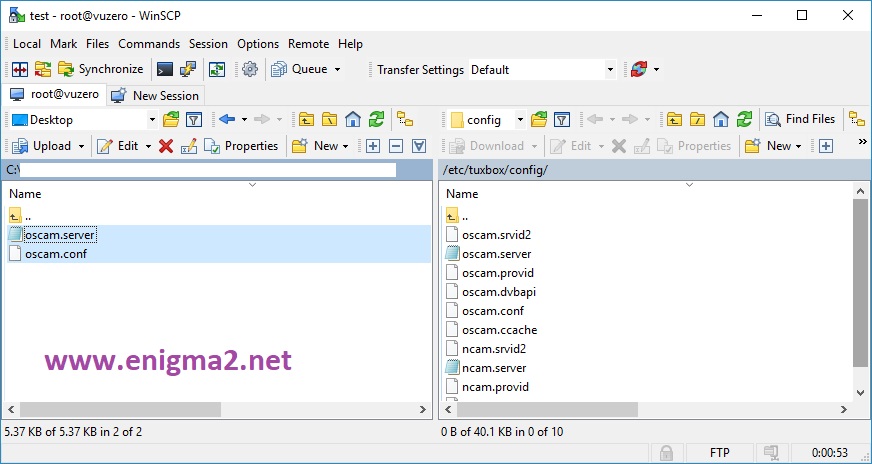
Copy subscription files from your PC to the /etc path of your receiver.
oscam.conf
oscam.server
3. Starting OScam
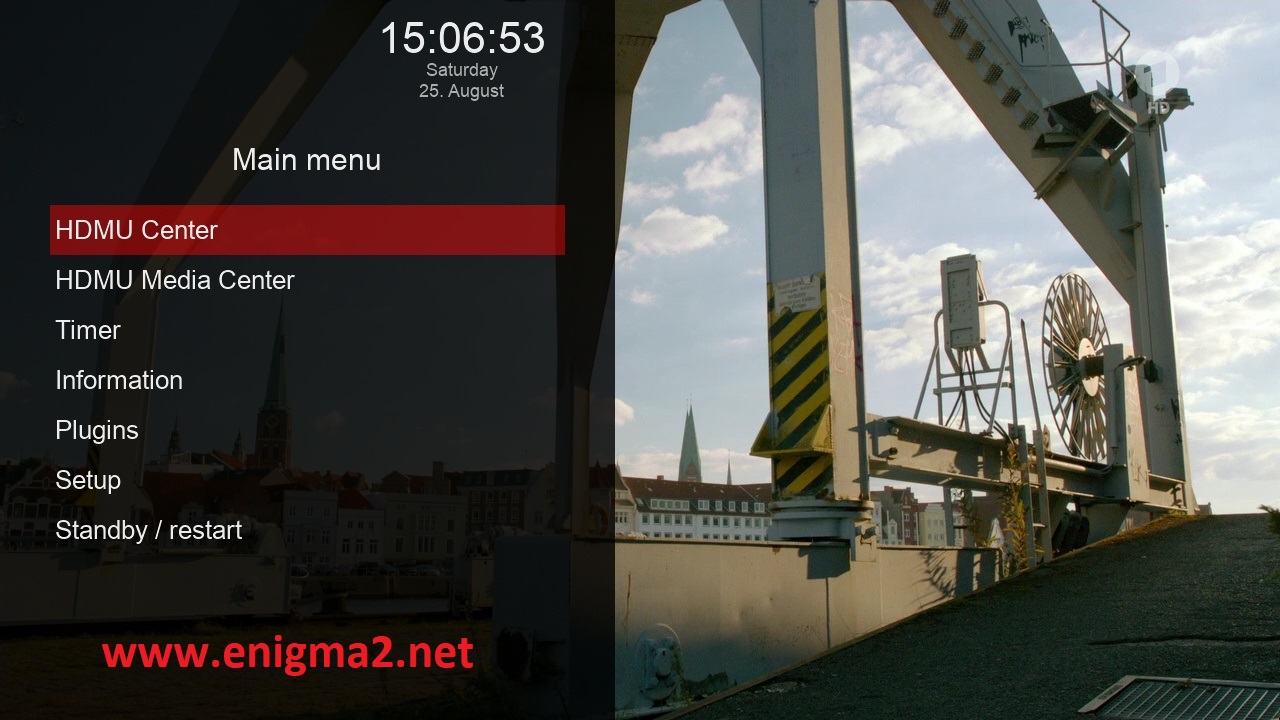
MENU –> HDMU CENTER

Choose softcam control
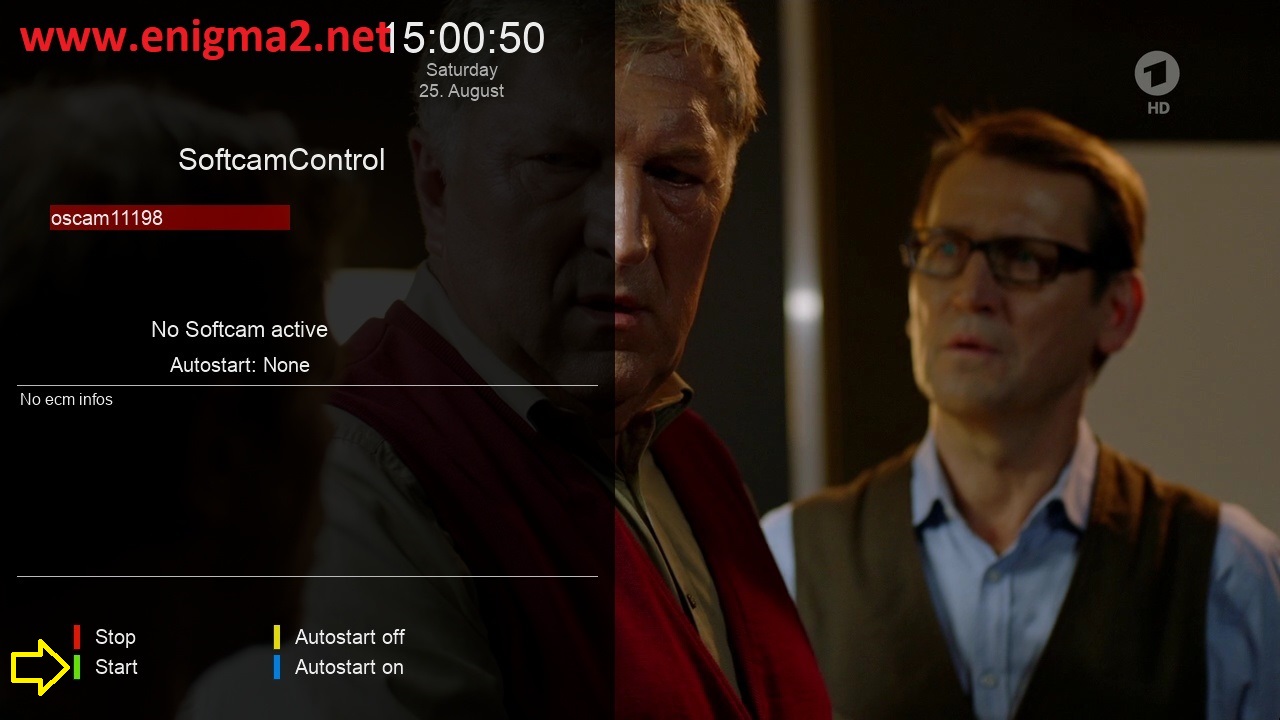
Choose OSCAM, and press GREEN BUTTON to start OSCAM
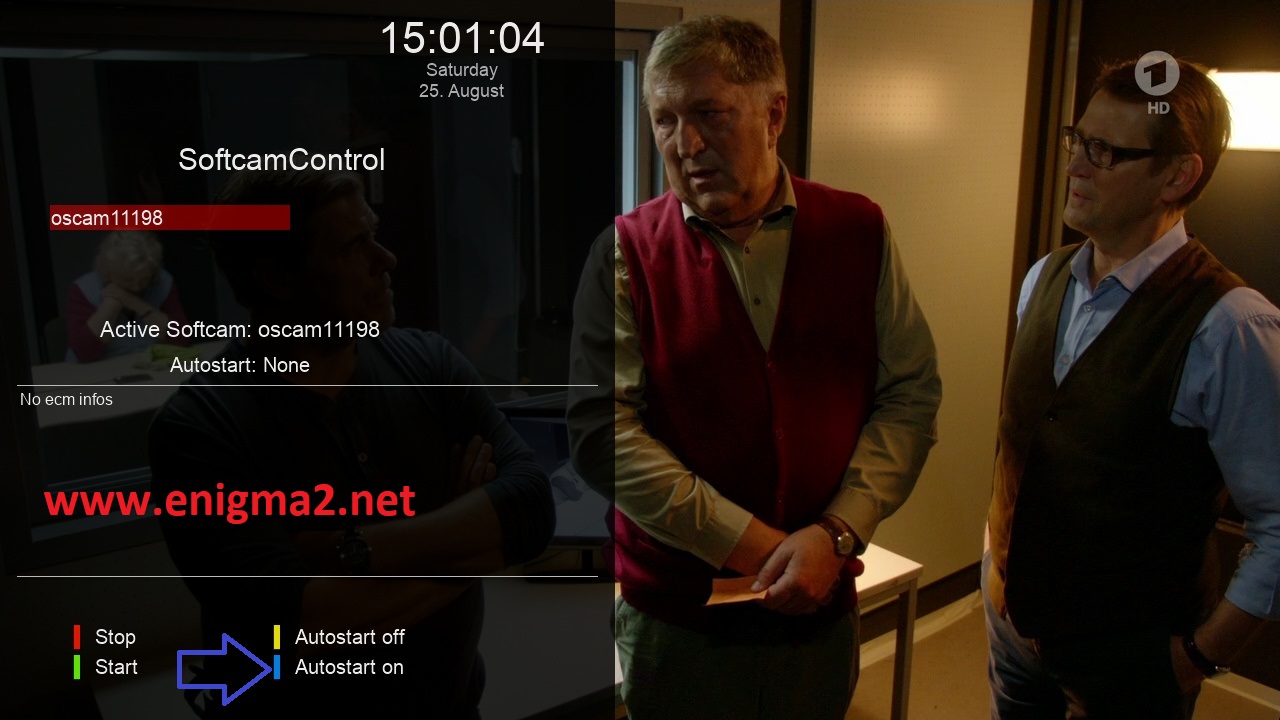
Now press BLUE BUTTON to enable autostart of OSCAM
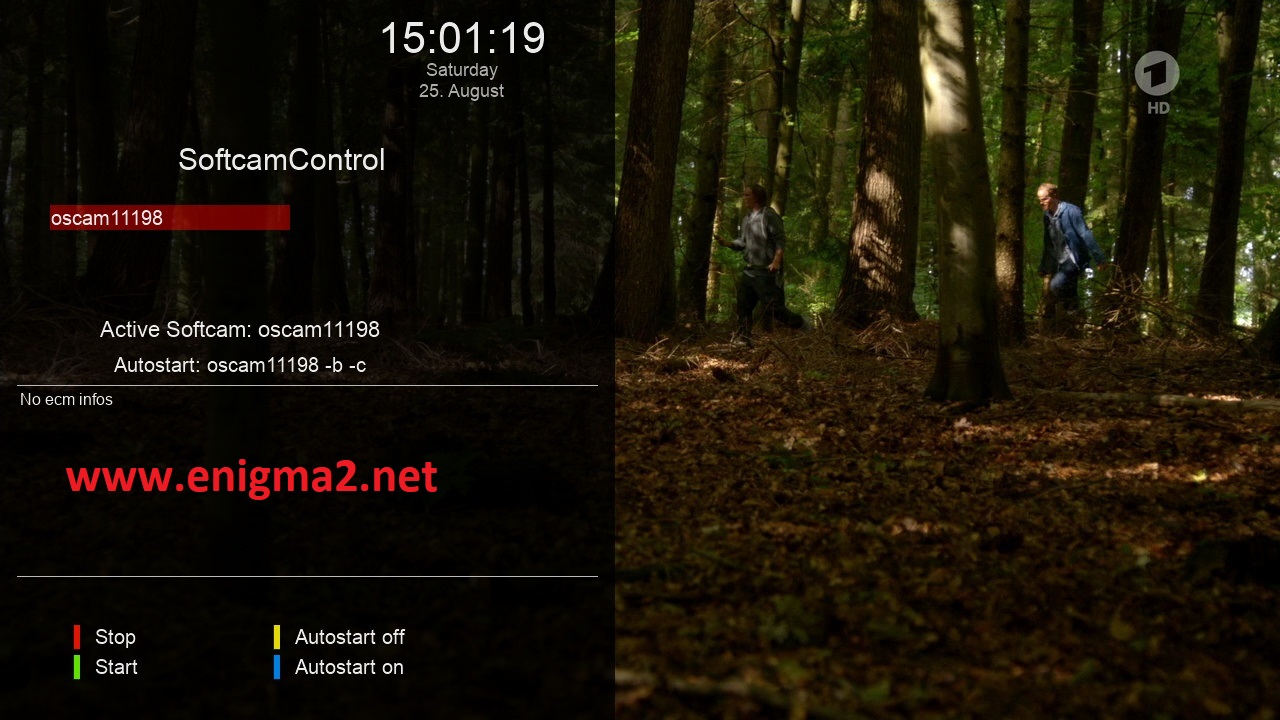
Done 🙂


VIDEO TEST


